Good project management is essential to the operation of any small business. Apptivo allows you to easily create projects, define milestones, and create the list of tasks that must be completed to make the project a success. Not only this, but you can define project templates to save time, and even use your employee database to define team members and a project manager. Apptivo offers the complete solution for small business project management.
The Project Management Apps & Features
Apptivo’s project management suite is made up of a few different apps that work together, let’s begin by covering what the purpose of each of these is for.
Projects: The projects app is the heart and soul of Apptivo’s project management. This is where you create individual “projects”, which are used to store requirements, set milestones, and group tasks & activities. Every project can be associated to a specific customer, and you can define an individual project manager, and the team of employees which will be working on the project.
Project Templates: This feature allows you to create standardized milestones & activities that repeatedly occur within your projects. Define an unlimited number of templates to cover every type of initiative your company takes on; doing so saves time, and keeps all projects consistent within your team. You can create new templates directly from the Projects app.
Sub-Projects: This feature allows you to not only group tasks & activities together, but group entire projects together. This allows larger organizations to individually tackle smaller parts of a larger initiative. Sub-projects are ideal for companies with larger teams that make project managment more difficult. Sub-projects can be created at any time when viewing the details of an existing project.
Timesheets: Time sheets are used to group together employee time spent on various tasks within the company for a given time frame. When creating a timesheet, an employee can simply select tasks which were assigned to them. Any task within a project in Apptivo will be automatically shown to the employee for reporting. Take a look at this blog for more information on how to start time tracking.
Setup & Configuration
- Once you have created an Apptivo account and logged in, the first step is to make sure the project management apps are enabled. You can enable/disable these apps at any time using the App Store. If you don’t see both apps available in the “Home” menu at the top of your screen after logging in, you’ll need to go through this step. If you already have all three apps available, skip to #3 below.
- Within the App Store you’ll see categories of applications available in the left column. Select the “Project Management” category, and click the “Add App” button for each app. Upon clicking this button, the app will become available on your Homepage for all future visits.
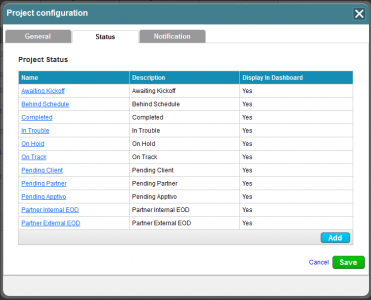
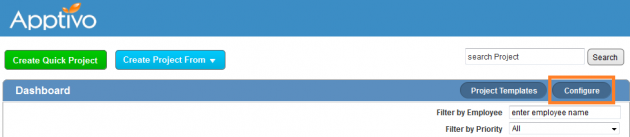
- Once you are able to access the Projects App, it is time to configure the App to fit the needs of your business. On the Projects App dashboard, you will see a button to configure this app.
- Within the configuration area, you can perform the following:
- Select whether employees must be added to a project, or whether any employee can view all projects.
- Configure recurring digests (or reports) of project activities, based on status.
- Create custom project statuses to be used for all company projects.
- Configure alerts for when users are added to a project, or promoted to project manager.


Creating Your First Project
- When you first open up the Projects App, you will notice a flow-chart showing you how the entire process works. We will be walking through this same process in detail below. Video version.
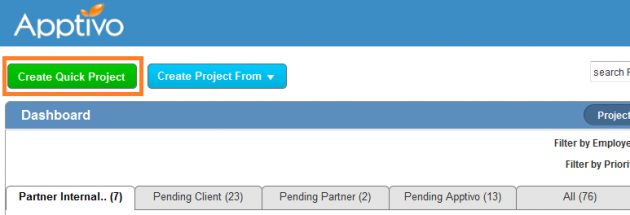
- Since this is your first project, we will begin by using the “Create Quick Project” button on the Projects Dashboard. In the future, you can create a project either from a pre-defined project template, or by copying an existing project.
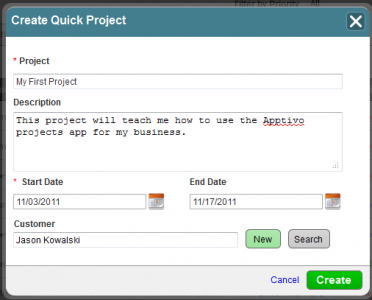
- Now, you’ll start off by entering some basic information about the project. Provide a name, and a brief description, as well as the start and end date. Lastly, you can define the customer this project is related to. You can either select an existing customer from your Customers App, or, you can add a new customer to your database by selecting “new”.
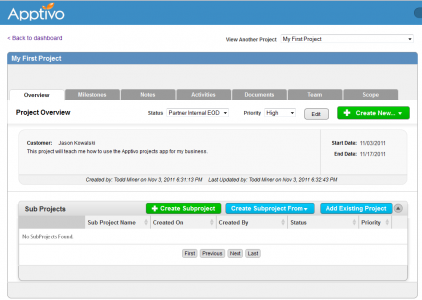
- Congratulations, you now have a new project! This project will now be listed on your Projects App dashboard, click the project name to view its details. Once you are on the project overview page, you’ll notice a series of tabs that each cover a different attribute of the project. In addition to these tabs, the sub-projects discussed above can be created, or added, directly from the project overview page. Here, you can also edit basic project information, or create a new milestone, case, or requirement.
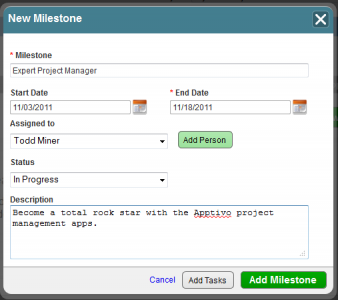
- The first tab you see on this page is “Milestones”. A milestone is a significant point of progress within the project. This can be something as little as completing the planning, or as large as completion of the project. Each milestone has a date, status, description, and it can be assigned to an employee of your firm.
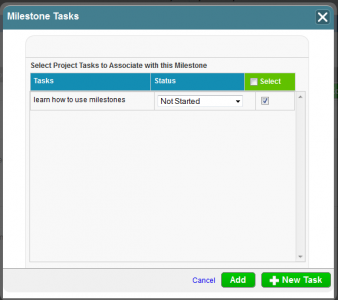
- The next step is to create some tasks that are required to reach this milestone. Tasks are the heart of the Apptivo platform, and provide your employees with a simple method of determining exactly what task they should be working on. Any task created for a project will appear within an employee’s homepage of Apptivo when it is due. You can either add tasks while creating the milestone, or add them later at any time.
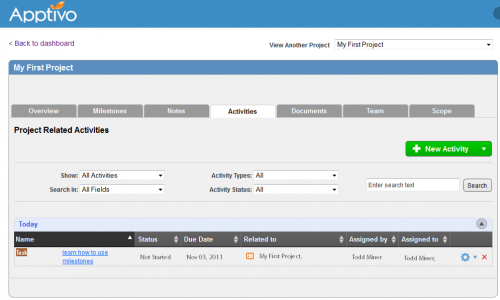
- On the milestones tab, you will now see a list of all milestones, and the progress regarding how many tasks have been completed so far. At any time, you can view the various tasks & activities for a project on the “Activities” tab. These activities will not be grouped by milestone.
- Next, we will want to start storing more detailed information about this project. Not everything related to this project can be summed up in the short project description, so a project has both a notes section, and a place to upload documents. The notes section is perfect for recording meeting minutes, or small updates on the project. Notes can be entered into a complete text editor that supports bullets, font color changes, and other formatting options. Each set of notes can be marked with custom “labels” to help organize.
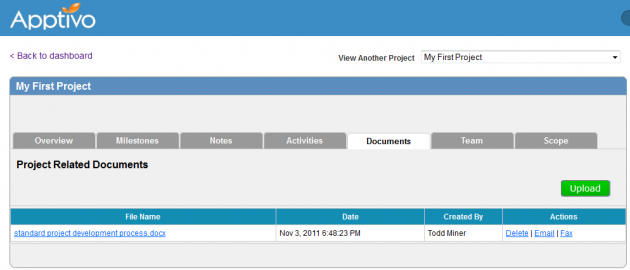
- Next, upload any sorts of documents related to the project, so all members of your team can access the files from a central location.
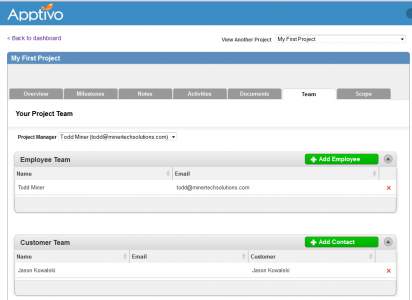
- Now, it’s time to set up the team your business will use to complete this project. Your team will consist of both your employees, and potentially, employees of your customer. Upon adding and employee or customer to a project, they will receive an email notification that contains instructions on how to access the project. They will be able to log into their own Apptivo account, and see the entire project. This allows you to easily share information, and keep everyone on the same page regarding documentation, deadlines, and project status.
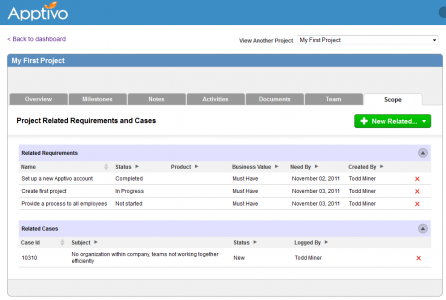
- Finally, the last remaining step is to define the project scope. Project scope includes any itemized requirements, or support cases which this project needs to address.


Summary
We’ve now covered how to get settled into Apptivo, access your project management apps, and configure them to your tastes. Then we walked through how to create a new project, and define milestones & tasks. Finally, we walked through the various different methods of storing and sharing the project information, including document storage, and defining the requirements of the project. You should now have all the tools you need to get started with managing your business’ projects on Apptivo.
Get started by registering for free here.
If you have any questions, or want to share your stories of success; please comment below!!


