Creating a Form
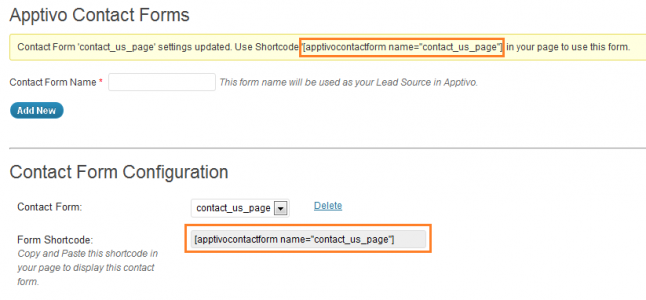
We’ll start off by going to the “Contact Forms” page in the Apptivo section of your WordPress dashboard. From here, we’ll type in a name for our new contact form and click “Add New”. You want to create a name that clearly represents the purpose of this form, the name will be used as a “Lead Source” in Apptivo, allowing you to sort leads by which form generated them.

Once the new form is created we can customize it. If you wish to change an existing contact form, simply select the form name from the dropdown at the top of the page.
Basic Form Configuration
Template Type & Template Layout
Template and Template Types allow you to control the HTML structure and layout of the form. For details on creating custom templates, see the advanced configuration section.
Confirmation Message
This is the message that will appear to the end-user when they submit the form.
Custom CSS
Custom CSS allows you to change the look & feel of the form itself. For details on using custom CSS, see the advanced configuration section.
Submit Button Type
You can configure this form to either display an HTML submit button with your text, or you can create a custom image to use for the button.
Button Text/Button Image URL
Based on the previous selection, you will either provide the text that appears on the button, or a URL where the button image can be found.
Apptivo Target List
If you’d like to collect submissions from this form into a target list in Apptivo, select the list here. A target list is used to run newsletters or other email campaigns.
Provide subscribe option to user
If you selected a target list, you can choose to provide the user with an opt-in checkbox on the form. If the user opts-in, they will be added to the target list. If you do not provide the option, all users are opted-in to the target list.
Contact Form Fields
Here is where you configure what fields are collected from the user. You can add a field by checking the “show” box, and force a user to complete the field by selecting “require”. Also, customize the order the fields appear in, and the text that is shown next to the field as well.
Custom Fields
If you desire to add a different field to collect with your form, you can add up to 5 custom fields. There are 5 different types of fields you can add, outlined below:
- Checkbox – Allow the user to submit yes/no answers. Commonly used to accept terms and conditions, or verify a user’s age.
- Radio Option – Provide the users multiple options, one of which must be selected. Used for the same purposes as a select.
- Select – Provide the users multiple options, one which must be selected. Commonly used for selecting a state, the purpose of the communication, or a list of categories.
- Textbox – This is the standard text field to collect basic information such as name, address, etc.
- Textarea – This is the same as a textbox, but contains multiple lines in a single field, allowing for longer responses.


Finishing Up
Once all fields have been filled in, simply click on “Save Configuration”. Upon saving the form, you will see the “Form Shortcode” appear in two places at the top of the screen. You can always access this later by coming to this page, and we’ll need to it integrate with the front-end of your site.